Digital art is artwork created with digital tools such as tablets, styluses and software like Photoshop, Procreate or Krita. It relies on digital brushes, layers and effects, unlike traditional art, which offers flexibility, precision and creative freedom. It is on desktops, tablets or smartphones, which makes it accessible to both professionals and beginners learning how to create digital art. Modern creators use automated platforms like Vosu.ai, which generate artwork through AI driven workflows and simplify the creative process for all skill levels.
Digital artwork processing starts with selecting software that matches the device, budget and artistic style. A sketch forms the foundation, which uses simple shapes to set proportions and composition. Layers then separate the sketch, colors, shading and background, which keeps the editing process organized and non-destructive. Base colors provide structure, while the sketch layer is refined or hidden to highlight clean linework. Shading, highlights and effects on separate layers create depth, light and atmosphere. Details and textures added with fine brushes or overlays give surfaces a polished finish. Final adjustments to color, harmony and balance guarantee a cohesive result. The completed work is saved in an editable format and exported in high resolution such as PNG or JPG, for sharing, printing or further editing.
Digital art tips for beginners highlight practice and exploration. Beginners must learn to manage layers effectively, experiment with brush types and study color theory and lighting. Small, manageable projects build confidence, while reference images improve accuracy. Beginner projects turn into polished pieces by saving work regularly, trying different styles and viewing mistakes as part of growth.
How to create digital art?
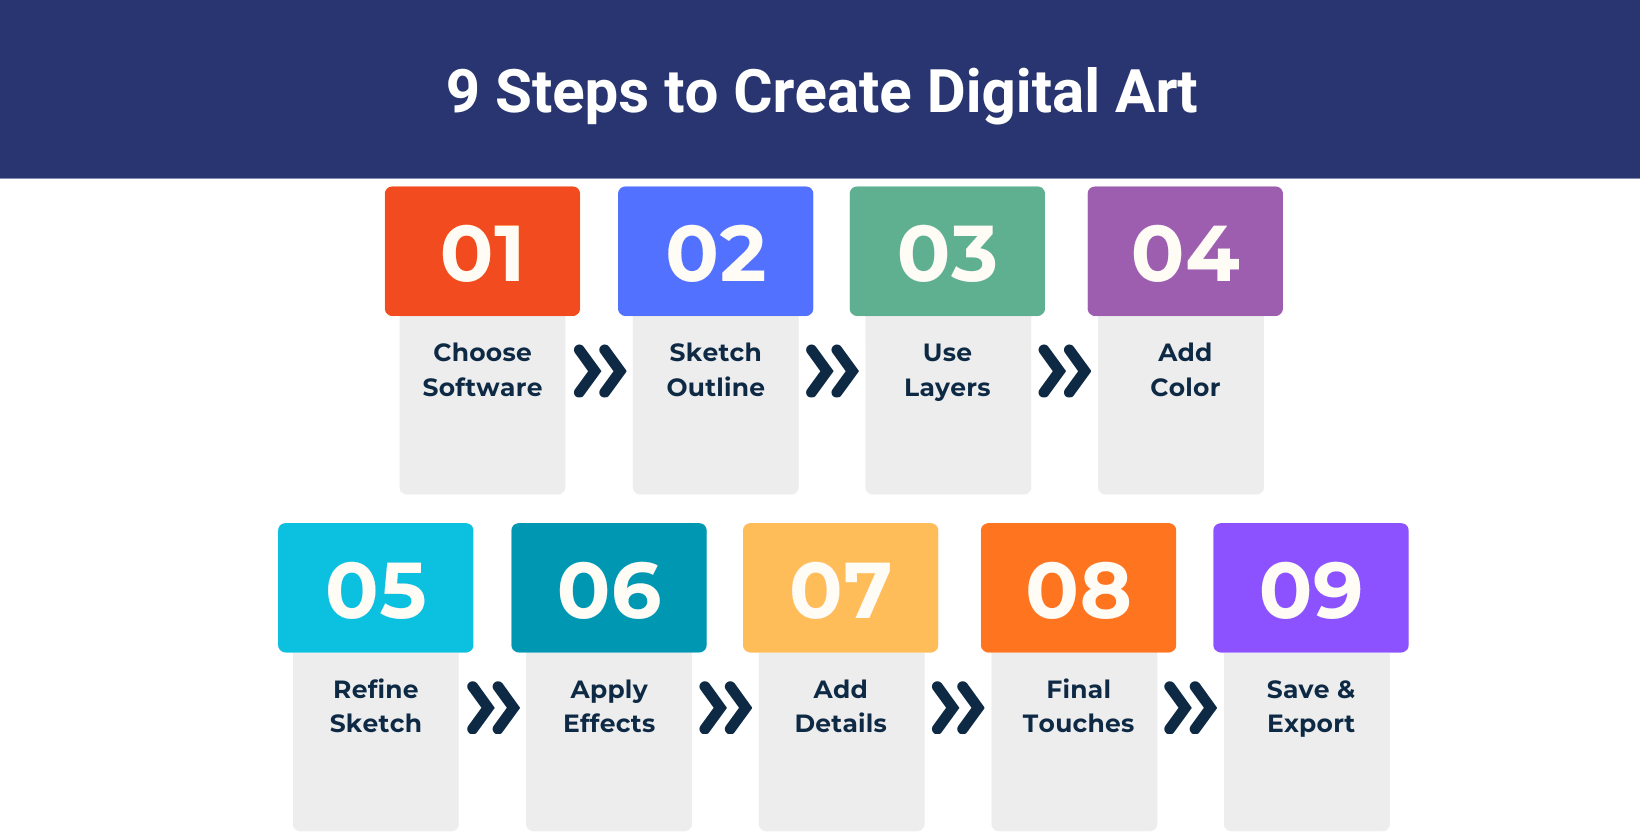
To create digital art, steps include the choice of digital art software, a sketch of the outline, the use of multiple layers and an adjustment of the sketch layer. The process is structured to provide maximum control, flexibility and creative freedom for various types of digital artwork.
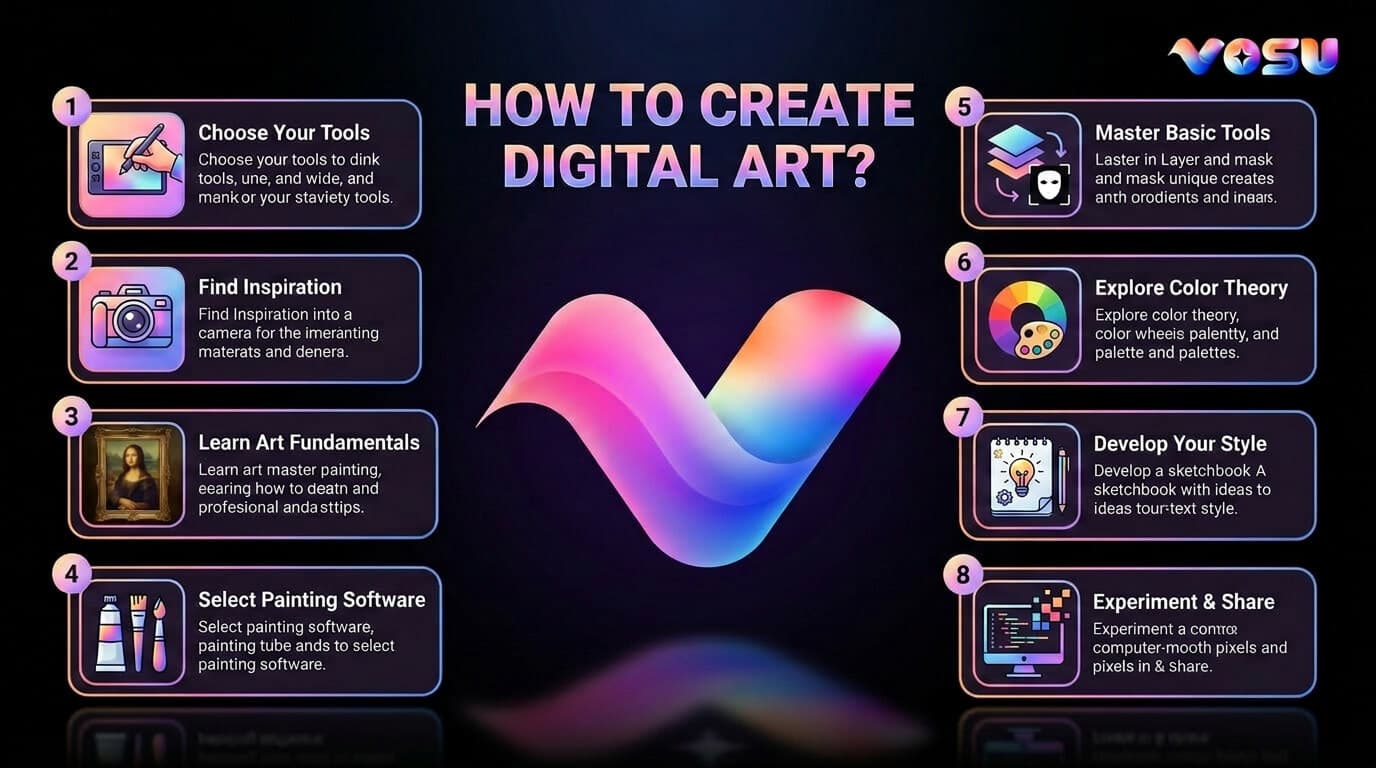
9 steps to create digital art are outlined below.
1. Choose a digital art software
Choose the right digital arts software depending on your device, budget and creative style and also important to match tools with your workflow. iPad users choose Procreate or Adobe Fresco for drawing with a tablet for beginners, as both offer intuitive touch controls and portability, while desktop users benefit from powerful computer art software like Adobe Photoshop, Clip Studio Paint, Corel Painter or Vosu.ai, which provide advanced features and pair well with drawing tablets.
Digital art software budget also plays a key role because free options such as Krita and Autodesk SketchBook serve as excellent recommended drawing software for beginners. Paid programs like Photoshop and Corel Painter deliver professional grade tools, extensive brush libraries and frequent updates. Your choice reflects art style as well, since Corel Painter and Rebelle specialize in natural media effects, Clip Studio Paint excels in comics and manga and Illustrator or Inkscape are best for vector art, whether you need art software for Windows, art software for Mac or simply reliable tools for drawing on PC.
2. Sketch the outline
Sketch the outline by starting simply and one of the best tips is to break your subject into basic shapes like circles, rectangles and triangles. This method creates a loose underdrawing that helps establish proportions and structure and it forms the foundation of your digital art sketch. Beginners create flexible outlines that are easily adjusted by using light lines and focusing on accuracy instead of detail, which is a key advantage of art sketching in a digital medium. Beginner's sketches have to experiment with brush sizes to refine them, like begin with a larger, softer brush to block out broad forms and then shift to smaller, firmer brushes for clean outlines and finer details. Brush opacity and size adjustments add variation and depth, which turns a rough draft into a polished piece. This approach supports a fluid, creative sketch drawing process and leads to dynamic results.
3. Work on multiple layers
Working on multiple layers is fundamental to digital art, which allows artists to separate different elements like a sketch layer for outlines, a color layer for base colors and a background layer for scenery. Layering is important because it provides flexibility, changes made to one separate layer do not affect others, which makes editing non-destructive and efficient.
Common layer types include the sketch layer for initial drawings, a color layer for filling in hues beneath the lineart and a background layer for environmental elements. Artists also use additional layers, for example, a shadow layer beneath the color layer, a highlight layer above it or an effect layer to add textures and lighting details. Each layer serves a clear purpose in building the final artwork, which keeps the workflow organized and manageable.
Controlling layers involves adjusting opacity to make them more transparent for blending effects and using blending modes like Multiply for shadows or Overlay for highlights. These settings allow layers to interact creatively, for example, to lower the opacity of a sketch layer before adding color or to experiment with blending modes to create realistic lighting and depth in digital art.
4. Colour your drawing
Colour your drawing by placing a color layer beneath the sketch or line art layer. Base colors are called “flat” colors, which are filled in main areas such as skin, hair, clothing or the background, keeping each section distinct and easy to refine. Separate layers represent major elements, while locked or clipped layers keep the coloring process tidy.
Color theory guides the next step, as artists compare hues to maintain the overall palette is balanced, harmonious and vibrant. Blended edges on separate layers simulate the softness of paint mixing in colorful digital art or digital art in watercolor. Color adjustment tools such as Hue/Saturation, allow artists to refine tones, correct mismatched hues or shift the mood of the artwork. Extra layers hold shading and highlights above the base colors for added depth, which creates a structured and organized digital painting that looks clean, dimensional and visually appealing.
5. Adjust the sketch layer
Adjust the sketch layer to create better integration between line work and colors. Opacity adjustment of the sketch layer to about 10% to 25% helps the lines blend into the coloring phase without overpowering. Blending modes such as Multiply or Overlay keep the color layers visible while preserving the sketch structure. Sketch cleaning through the removal of stray marks or overlaps secures clarity.
Sketch duplication provides a preserved original for safe editing. This process helps the sketch support the added colors and maintain cohesion in the artwork. Layer organization through grouping of sketch and color layers improves clarity. Layer labeling with specific colors in the palette makes identification easier. These steps guarantee the sketch supports rather than competes with added color, which results in cohesive digital artwork.
6. Add shading, highlights and effects
Add shading, highlights and effects by placing the light source carefully to determine the direction of illumination and define where shadows and highlights appear. Shadows are added on a separate shading layer using the Multiply or Darken blending modes, with darker tones applied to areas that do not receive light. Highlights are painted on a new layer using Screen or Lighten blending modes, which focus lighter colors on areas where light strikes directly. Effects such as glows are applied on extra layers with Overlay or add blending modes to improve the atmosphere. Shading and highlights together define form and depth, while light and effects set the mood and give the artwork a three dimensional quality. Blending these layers and effects finally unifies the composition and intensifies the overall sense of realism.
7. Add details and textures
Add details and textures to high quality digital art by zooming in and refining intricate areas through the use of small highlights, surface textures and precise edge details. Texture brushes are useful for creating natural surfaces such as skin, fabric or stone, while line weight variation helps improve depth and realism within the composition. Overlays and soft light layers are applied to subtly build texture, atmosphere and dimension without overwhelming the base colors. Edge effects further strengthen the visual impact by sharpening focal areas while softening the background, which assures the subject stands out clearly. Artists achieve a visually rich, appealing finish that elevates the overall realism of the work by layering textures, adjusting opacity and experimenting with blending modes.
8. Finalize adjustment and finishing touch
Finalize adjustment and finishing touch by adjusting layer opacity so that colors blend smoothly and the foreground and background feel unified. It uses blending modes such as Overlay, Multiply, Add or Screen to create natural highlights, deepen shadows and add glowing accents that integrate seamlessly into the painting. The digital artwork also has its layers repositioned when needed and it can be flipped horizontally to spot mistakes and maintain overall balance. It receives global adjustments with color correction layers to refine contrast and saturation, while Hue/Saturation is used to unify the palette across the whole piece.
The digital artwork gains more depth by adding a soft glow with bright colors on an Add or Screen layer, followed by a subtle blur to improve the atmosphere. It includes details like sparkles or light streaks using a custom star shaped brush or a scatter brush, with careful adjustment of blending modes and opacity for subtle effects. These steps help the artwork appear polished, cohesive and visually engaging.
9. Save and download your digital art
Save your digital artwork as a PSD or the native project file (like Procreate or Krita), which preserves layers and allows future editing to export your digital art as an editable format. Your final artwork must export as a PNG or JPG and make sure the resolution is set high (e.g., 300 DPI for printing) for downloading the best, high resolution version. PNG is best for lossless quality and transparency, while JPG is suited for smaller file sizes and general use. You have to double check export settings to maintain optimal quality for use or sharing.
The key steps to create digital art are shown in the image below.
What are the best tips to create digital art for beginners?
The best tips to create digital art for beginners are practice with layers, experiment with brushes and textures, study color theory and lighting and use reference images.
8 best tips to create digital art for beginners are outlined below.
- Practice with layers: Digital art becomes more manageable when beginners use layers to separate sketches, colors and shading. This simple digital art technique allows easy adjustments without ruining the entire piece.
- Experiment with brushes and textures: Digital art improves when beginners experiment with different brushes and textures. These digital art tips add unique variety, which turns simple drawings for starters into expressive and more dynamic artwork.
- Study color theory and lighting: Digital art for beginners looks more realistic when color theory and lighting are understood. Recognizing how highlights and shadows work elevates even easy digital art into more professional results.
- Use high resolution: Digital art tips recommend always starting in high resolution. This assures clean details and sharp lines, which makes beginner digital art appear smooth, polished and suitable for future edits or printing.
- Regular practice and embracing mistakes: Digital art skills grow through regular practice, even when making mistakes. Beginner digital art benefits from experimentation, as errors lead to stronger artistic confidence and improved techniques.
- Seek feedback and inspiration: Digital art learning becomes faster when beginners seek feedback. Tips for digital art include joining online communities or groups, where inspiration, advice and constructive critique strengthen your growth.
- Use reference images: Digital art gets easier when reference images are used for anatomy, perspective or objects. This simple digital art habit supports accuracy and helps beginners avoid guesswork in challenging designs.
- Start simple and track progress: Digital art tips suggest starting small with basic shapes or sketches. Tracking progress motivates beginners by showing clear improvement in drawings for starters over time.
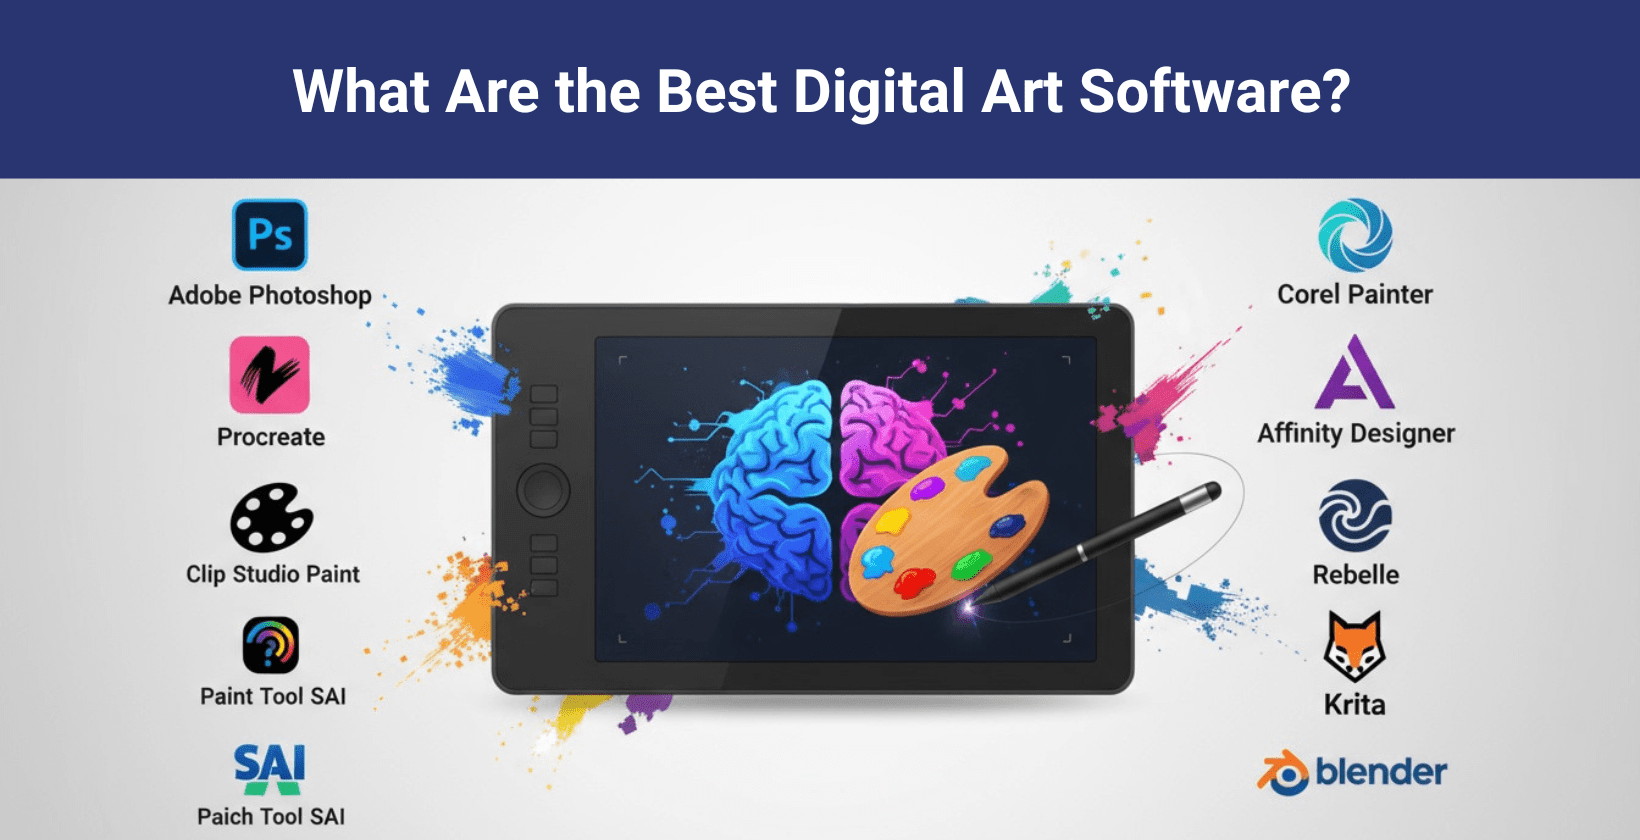
The best digital art software are mentioned in the image below.
What is the best free digital art app for beginners?
The best free digital art app for beginners is Krita, as it combines an intuitive interface with professional grade tools such as layers, hundreds of brushes, brush stabilizers and vector support. It remains completely free without trials or subscriptions, offers powerful customization and supports a thriving community. These things make it ideal software for digital art, free learning and easy creation for digital art newcomers.
What equipment do I need to create digital art?
The equipment you need to create digital art is given below.
- Laptop or desktop PC: Digital art on a laptop or PC requires at least 16GB RAM, SSD storage and a discrete graphics card for smooth editing tasks.
- Drawing tablet (pen/display tablet): Digital art drawing tablet with pen display, like Wacom or Huion, allows natural brush control and pressure sensitive input for sketching.
- Digital pen/stylus: Digital art requires a pen or stylus for accurate, comfortable drawing, ideal for both detailed rendering and casual sketching sessions.
- Screen protector: Digital art screen protector shields displays from scratches and glare, which prolongs device life during frequent drawing sessions.
- Free digital art software: Digital art free tools online such as Medibang, ibisPaint and Sketchbook, provide accessible drawing and painting without upfront cost.
- Essential software: Digital art essential software includes Photoshop, Procreate, Clip Studio Paint, Krita and GIMP for advanced painting and editing features.
- Graphics card (GPU): Digital art’s dedicated graphics card (GPU) supports complex brushwork, large canvases and fast rendering for professional project workflows.
- Color-accurate monitor: Digital art setup benefits from a color accurate monitor to maintain reliable editing, printing and sharing with consistent shades and vibrancy.
- Drawing shortcut remote: Digital art shortcut remote or programmable keys help switch tools, layers and brushes, which increase workflow speed during production.
- Ergonomic desk/chair: Digital art ergonomic desk and chair are crucial for long sessions, which support posture and reduce fatigue for healthy creative habits.
Can AI create digital art?
Yes, AI can create digital art because text-to-image AI art generators use advanced algorithms to turn written prompts into unique visual content. These tools allow users to produce prompt based digital art quickly and with high creative flexibility. Some of the best AI art generators people use today include Vosu.ai, MidJourney, DALL·E 3 and Stable Diffusion.
Can AI convert a picture into digital art?
Yes, AI can convert a picture into digital art because advanced AI tools use image-to-image technology to transform photos into digital paintings, cartoons or various artistic styles quickly and automatically. The leading options for this include Vosu.ai, Fotor, NightCafe, Artguru and PhotoDirector. These tools support converting photos to digital art or digital paintings online for free.
How to create digital art in Vosu.ai?
9 steps to create digital art in Vosu.ai.
1. Select the AI model or style from the dropdown at the top. Vosu provides 31 models, including Flux Lora, Flux Ultra, Aura Flow and Bytedance Seedream V4.
2. Type your art description in the "Prompt" box (e.g., "A futuristic cityscape at sunset").
3. Turn the "Prompt Enhancer" on or off as needed.
4. Click idea tags or the refresh icon for prompt suggestions if needed.
5. Choose your desired aspect ratio (4:3, 1:1, 1:1, 3:4 or 9:16).
6. Enter the number of images to generate in the "Number of Images" field.
7. Set the "Safety Checker" to On or Off based on content requirements.
8. Type a specific seed number for reproducible results (Optional).
9. Click the "Generate" button to create your digital art.
Can I sell digital art created by AI?
Yes, you can sell digital art created by AI because most platforms accept AI-generated art if it is original and respects copyright rules. You must review each AI tool’s commercial use policy, avoid copyrighted content and follow marketplace guidelines when using websites that pay for digital art or AI art stores.
Can I do digital art on my phone?
Yes, you can do digital art on your phone because mobile apps for digital art make it possible to sketch, paint and edit directly on a touchscreen. You only need a smartphone, a responsive stylus for accuracy and creative apps like Procreate Pocket or IbisPaint X, while the level of precision is lower than using a tablet or drawing monitor.

